I am working on improving my curve turn, and at the same time, I am also working on re-design my new mouse. I updated the version for my new mouse from 3.X to 4.0 since there will be a big change from previous 3.X version that I fabricated earlier.
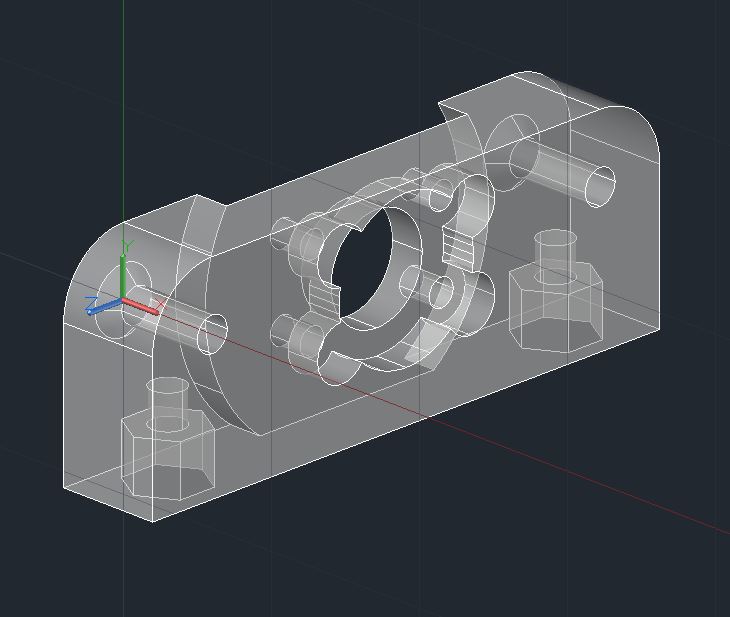
First thing is to redesign the motor mount. Other than have 2 long screws all the way went through the motor mount and have nuts on of top of the mount to secure the motor mount on PCB, I choose to have a much neat way to have my motor mount attached. Since I will still use 3D printing as the method for constructing my motor mount, I reserved 2 hex shape slots under the motor mount in order to fit 2 M2 hex nuts. I plan to use epoxy glue to have 2 either nylon or steel hex nuts glued inside of the mount. In this case, when the glue drys, I can just have 2 short M2 screws to solidly secure my motor mount on the PCB. It is not just reduce the overall weight for my mouse, but make the looking for the mount much nicer as well. Besides, I can make mount 3mm shorter on each side to leave more space on PCB for components. I believe the new mouse will look much better than my current one in this case.
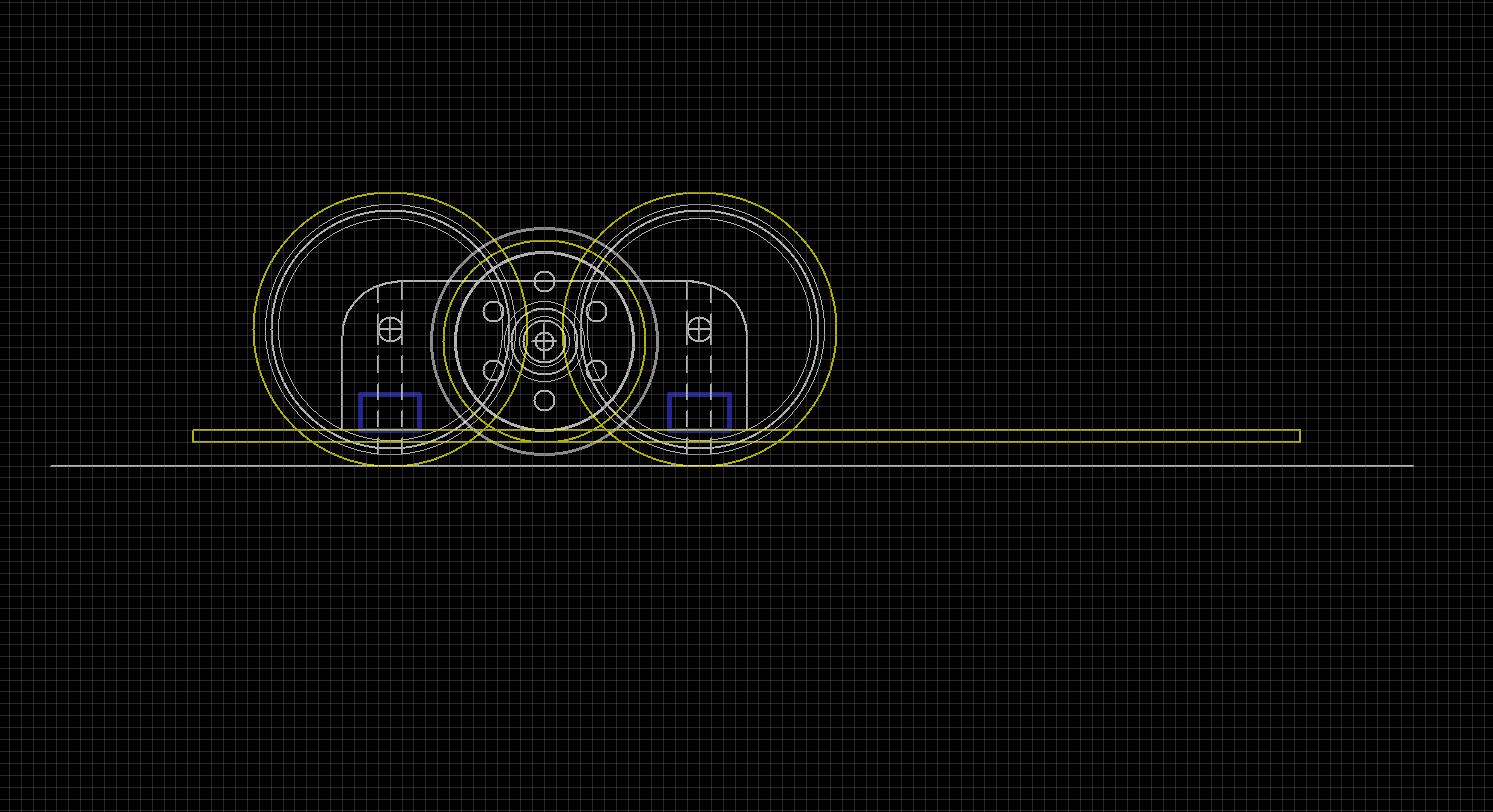
One other thing is to low the clearance for the mouse.
Since I was using 24.5mm diameter wheel this year, I ended up had almost 4mm clearance to the floor. This feature will become a big disadvantage when competing to those ultra low CG mouse in competition, especially for turning. In order to low CG easier, I made 2 change:
1. shrink the diameter of my wheel from 24.5mm to 23mm
2. change the gear ratio from 12:40 to 11:40
3. lower the position for motor by 1mm
thus, the current clearance for new mouse is like 2mm now. pretty much same CG as other people with low CG.
However, in order to achieve such a low CG, I need to find screw with super thin head. With the help of Mr Harjit Singh, I was able to find these kind of thin flat head M2 screws on some site. one site in U.S.A that he recommend is amainhobbies.com. Basically these screws are for camera or laptops.The head they have is always thinner than 1mm.
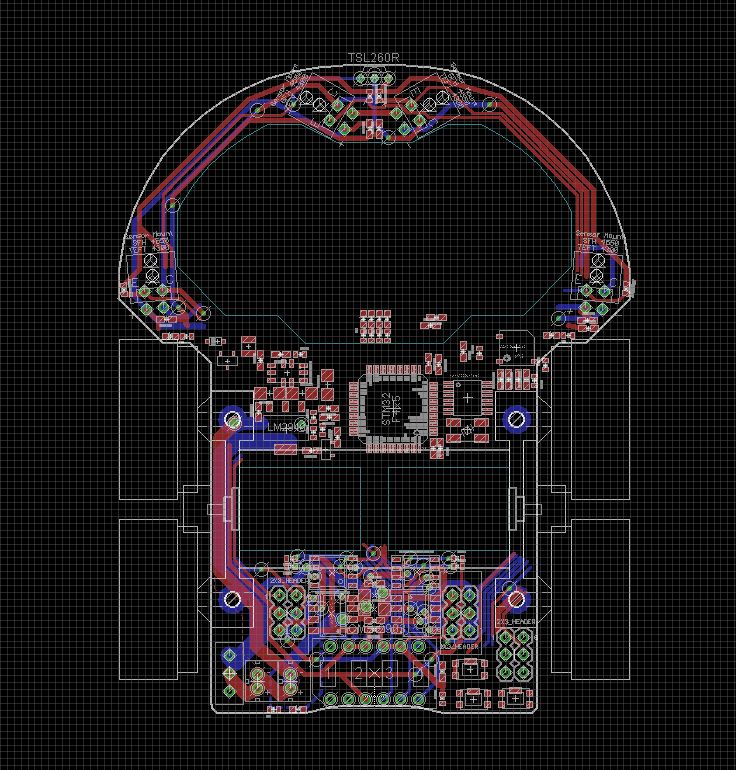
one last thing is to re-design my mouse PCB.
after what I’ve been through with various 3.X version I had(I had 6 different version designed for 3.X mouse, but only published 1 or 2 or them), based on what I’ve learned from APEC, I decided to have some change on the PCB. first change is I am trying to switch my gyro from LY3200 to ADXRS620 since ADXRS620 has a way better bandwidth and less noise based on what I’ve heard from other entries from APEC who were using ASXRS610/620 as the gyro for their mice. Though ADXRS620 will be larger and much more expensive than LY3200, I still looking forward to have in on my new mouse. basically the price for a single ADXRS620 equals to more than 10 times of a LY3200 gyro, also the package is BGA(hard to solder). In fact this becomes a great trade off to decide between 2 different gyros, I need to make a decision sooner or later. Some facts I have here are Peter Harrison and Tzong Yong Khiew are using LY3100/3200 and performed pretty well for their mouse even though they admitted that the gyro is noisy. On the other hand, most of the competitor in the world are using ADXRS610/620 as their primary choice for gyro. This finally makes my choice pretty difficult. well, I will try to have the decision done by one month……. 🙁
The other thing I have to make sure is to control the weight for PCB by mill off as much area as possible to he front. Since Kato made his Tetra 71g(don’t know if the battery is included), I feel it’s really hard to make the mouse as light as his mouse, since I wanted to add more components than him, including a 4 digits alpha numeric display. So my goal is just to make the mouse’s weight around 90g with battery since the weight for my current mouse is about 90.7g without battery(fare enough).
Other than those big changes above, the rest are just smaller changes and don’t worth me to mention here.
Hopefully everything will go well, especially my broken curve turn.

I really appreciate your candor and openness in your progress with your mouse. Looking at the LY3200 (LGA) and all the components on your board, how do you currently solder everything?
Since I don’t have re-flow oven available, I just simply use thin tip to apply solder paste to solder pad on PCB, carefully place parts on the pad by using tweezers, then use hot air station to slowly heat up the component at a proper temperature and a low fan speed. Probably gyro is the hardest part to solder, you may need to take extra patient and precaution to get this job done.
It sounds challenging. Once you get beyond TSSOP and TQFP it seems hot air, reflow oven, or hot plate are the only methods possible for soldering. Kudos to you on making it work.
yeah, actually I saw someone use only solder iron to solder LY3200 gyro by extending the length of solder, but it’s hard for me too. Good thing is LY3200 is only 4 bucks each, and I usually leave it last to solder. After all it’s expendable to use hot air station to solder it. I tried to use hot plate to heat pcb before but turned out it burned the back of PCB.
Pingback: update: Finalized Design for Green Giant V4.1 Lite, PCB design submitted. | Micromouse USA